

SharePoint Mentor Curated Articles
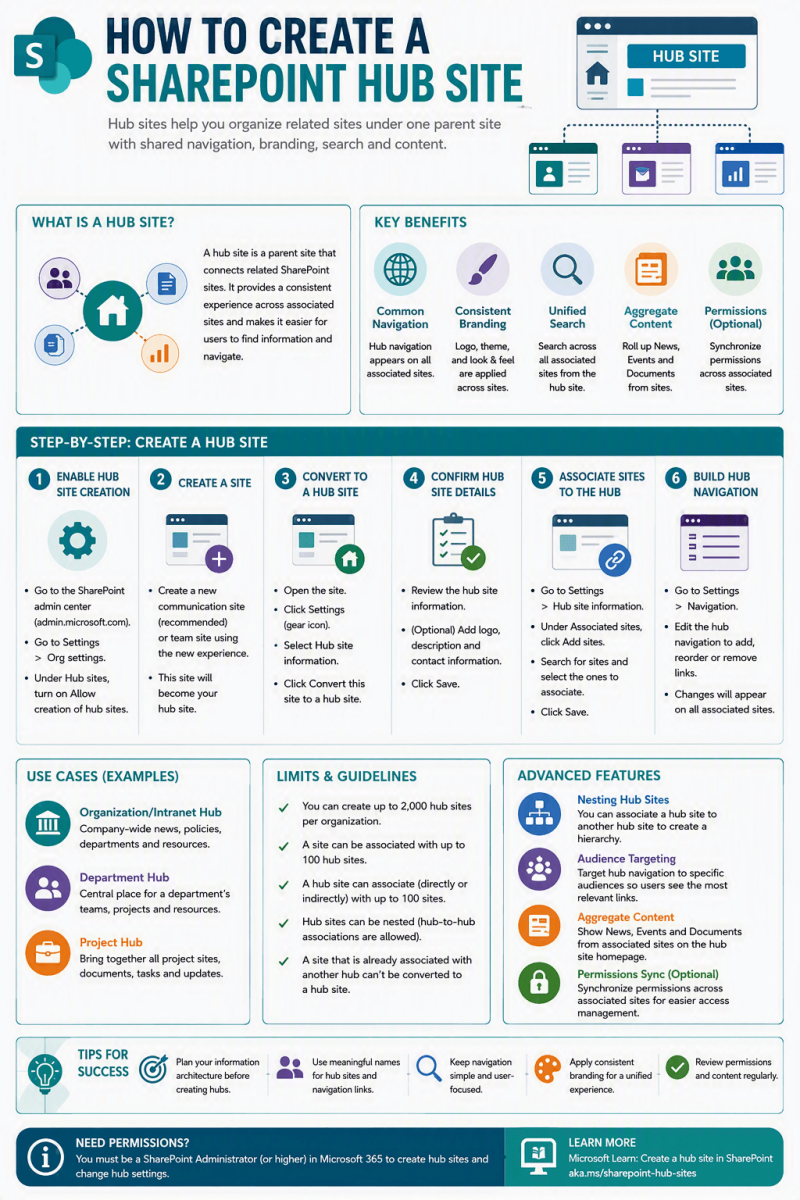
How to Create a SharePoint Hub Site - and Associate a Communication Site with It
A Step-by-Step Guide for Microsoft 365 Administrators and Site Owners
Introduction
A SharePoint hub site is a central connection point that organizes and links related sites based on organizational attributes such as project, department, division, or region. Hub sites provide shared navigation and branding, content roll-up (news, activity, and search), and a consistent home destination for related content across associated sites.
This guide explains how to:
- Create (register) a SharePoint Hub Site from an existing site
- Associate a SharePoint Communication site with the newly created Hub Site
Prerequisites
Before you begin, ensure the following:
- Permissions: You must be a SharePoint Administrator (or higher) in Microsoft 365 to register a site as a hub site.
- Existing site: You need an existing SharePoint site (preferably a modern Communication site or modern Team site) that will become the hub. You cannot create a hub site from scratch—you convert an existing site.
- Recommendation: Microsoft recommends using a Communication site as the hub because it is designed for broad audiences and consistent branding.
- Site association limit: A site can be associated with only one hub at a time. Sites already associated with another hub cannot be converted into a hub site.
- Hub limit: Organizations can create up to 2,000 hub sites. There is no limit on the number of sites that can be associated with a single hub.
Part 1: Create a SharePoint Hub Site
Follow these steps in the SharePoint admin center to register an existing site as a hub site.
Steps to Register a Site as a Hub Site
- Go to the SharePoint admin center. Sign in with an account that has SharePoint Administrator (or higher) permissions. Navigate to Active sites (typically under Sites in the left navigation).
- Select the site. In the list of Active sites, select the checkbox next to the site you want to convert into a hub site (preferably a Communication site).
- Open the Hub menu. On the command bar, select Hub, then choose Register as hub site.
- Configure the hub settings. In the panel that appears:
- Enter a Display name for the hub site. This name appears in the hub association dropdown and helps site owners identify the hub.
- Specify the individual users or security groups who are allowed to associate sites with this hub in the “People who can associate sites with this hub” box.
Important: If you leave this box empty, any user can associate their site with the hub. It is a best practice to restrict association rights to specific owners or groups.
- Select Save. The site is now registered as a hub site. A hub navigation bar will appear at the top of the site.
Notes and Best Practices
- After registration, you can further customize the hub (logo, navigation, theme, and site design) from the hub site itself via Settings > Hub site settings.
- Ensure that all users who will be allowed to associate sites with the hub already have at least Read permission to the hub site.
- You can also manage hub sites using PowerShell (Register-SPOHubSite or PnP PowerShell cmdlets) for automation or bulk operations.
- To change the display name or association permissions later, use Hub site settings on the hub site or PowerShell.
Part 2: Associate a Communication Site with the Hub Site
Once the hub site exists, you can associate existing Communication sites (or Team sites) with it. Association provides shared navigation, consistent branding (theme), and content roll-up capabilities.
Method A: Associate from the Site Itself (Recommended for Site Owners)
You must be a site owner (or higher) of the Communication site you want to associate.
- Open the Communication site that you want to associate with the hub.
- Go to Settings. Select the Settings gear icon in the top-right corner, then select Site information.
- Choose the hub. In the Edit site information panel, locate the Hub site association section. Select the newly created hub site from the dropdown list.
- Optional – Sync hub permissions. If the hub has enabled permission syncing, a checkbox will appear. Checking it adds visitors managed by the hub as visitors on your site (this does not override existing permissions).
- Select Save.
- Confirm the association. After saving, the site inherits the hub’s theme and the hub navigation bar appears at the top of the site. If the hub requires approval for associations, the request must be approved before the association takes effect.
Method B: Associate from the SharePoint Admin Center
SharePoint Administrators can associate one or more sites with a hub from the admin center.
- Go to Active sites in the SharePoint admin center.
- Select the site(s). Select the checkbox next to the Communication site (or multiple sites) you want to associate.
- Open the Hub menu. On the command bar, select Hub, then choose Associate with a hub.
- Select the hub. In the panel, choose the target hub site from the list.
- Select Save to complete the association.
Automatic Association When Creating New Sites
If you navigate to an existing hub site and select Create site (in the top-right area), any new Communication site or Team site you create will be automatically associated with that hub.
What Happens After Association
When a Communication site is successfully associated with a hub:
- Shared navigation: The hub site’s top navigation bar appears on the associated site.
- Consistent branding: The associated site inherits the hub’s theme. You can no longer independently change the theme of the associated site.
- Content roll-up: News, activity, and other content from the associated site can appear in hub web parts (when configured to show content from all sites in the hub).
- Search scope: The associated site is included in the hub’s search scope.
- Permissions remain independent: Association does not automatically change site permissions (unless hub permission sync is enabled and accepted).
Troubleshooting Common Issues
Hub site association option is greyed out or empty
This usually means you do not have permission to associate sites with the hub, or the organization has not configured any hub sites. Contact a SharePoint Administrator to grant association rights or verify hub registration.
Association requires approval
Some hubs are configured to require approval before a site can join. In that case, the association request is submitted and must be approved by a hub owner or designated approver.
Cannot convert a site to a hub
Sites that are already associated with another hub cannot be registered as a hub site. First disassociate the site from its current hub, then register it.
Additional Resources
- Official Microsoft documentation:
- Create a hub site in SharePoint
- Associate a SharePoint site with a hub site
- Set up your SharePoint hub site
- What is a SharePoint hub site?
This guide is based on official Microsoft documentation for SharePoint in Microsoft 365. Interface labels and available options may vary slightly depending on your tenant’s configuration and release channel.