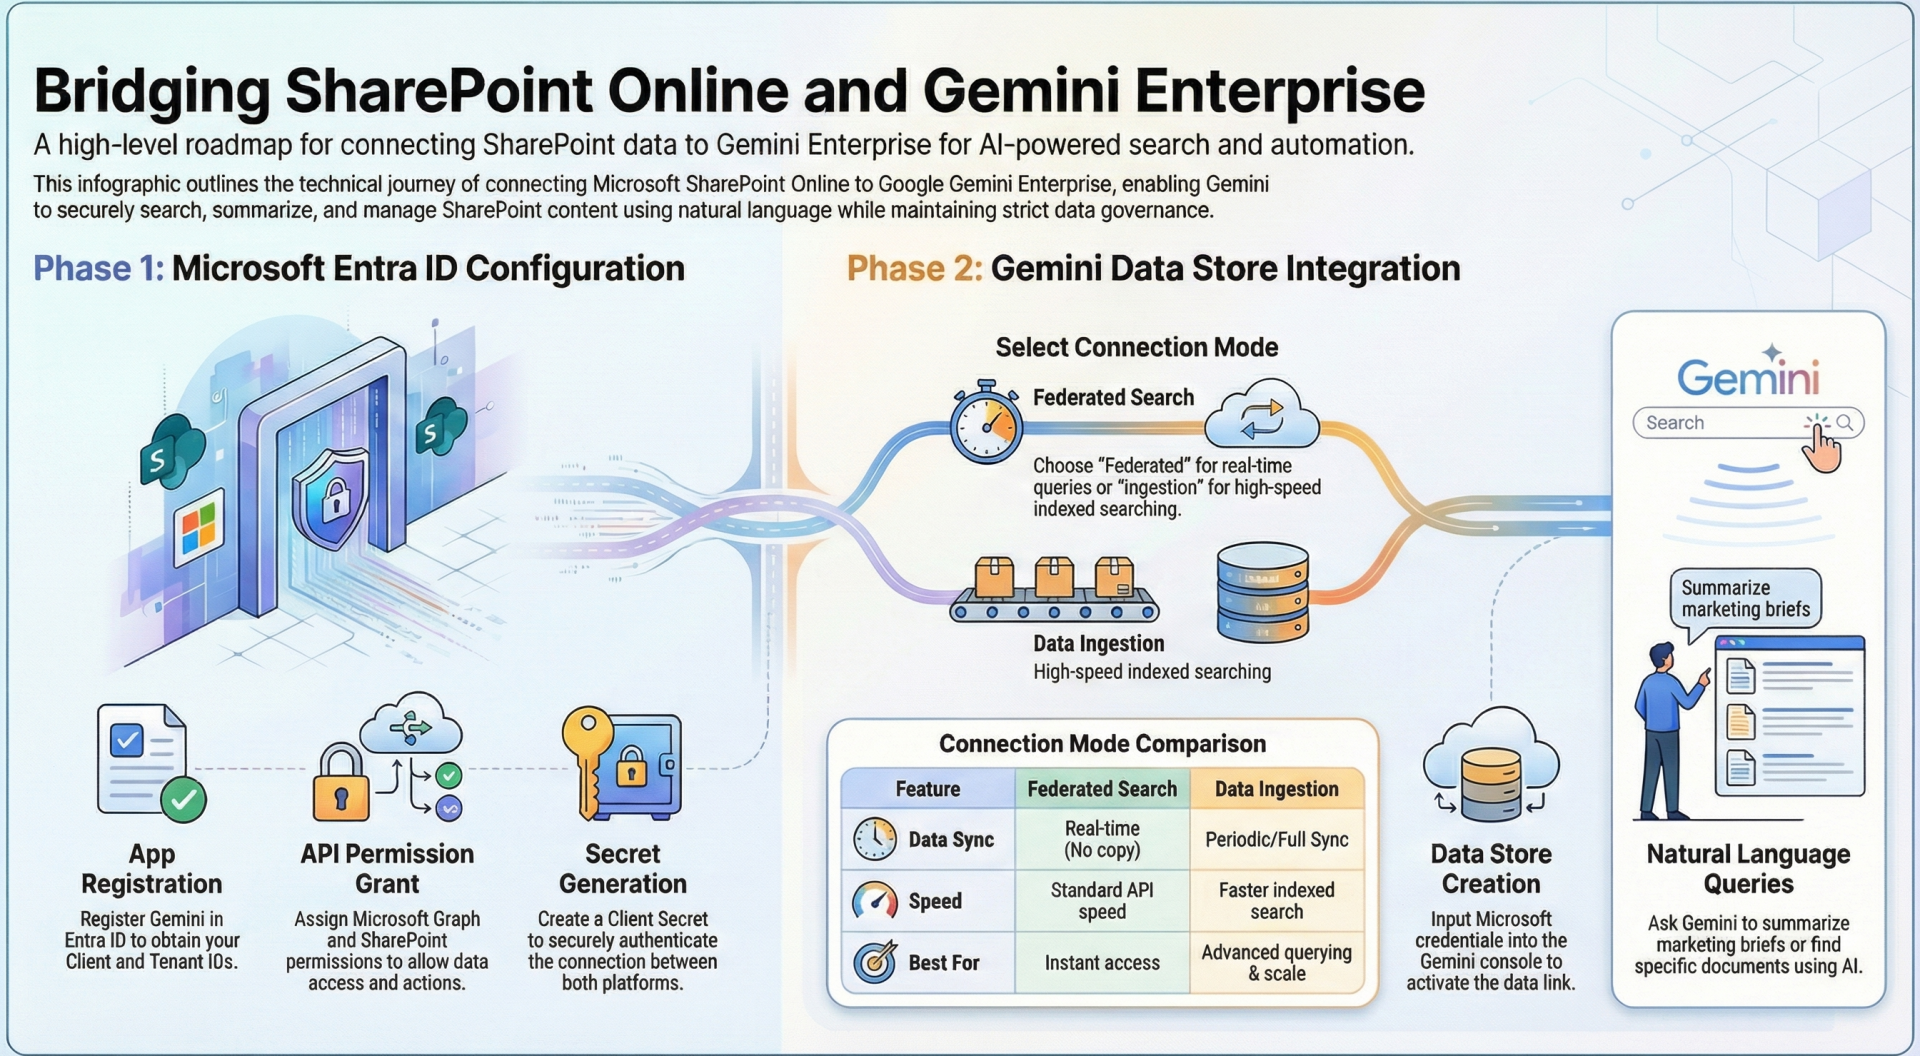
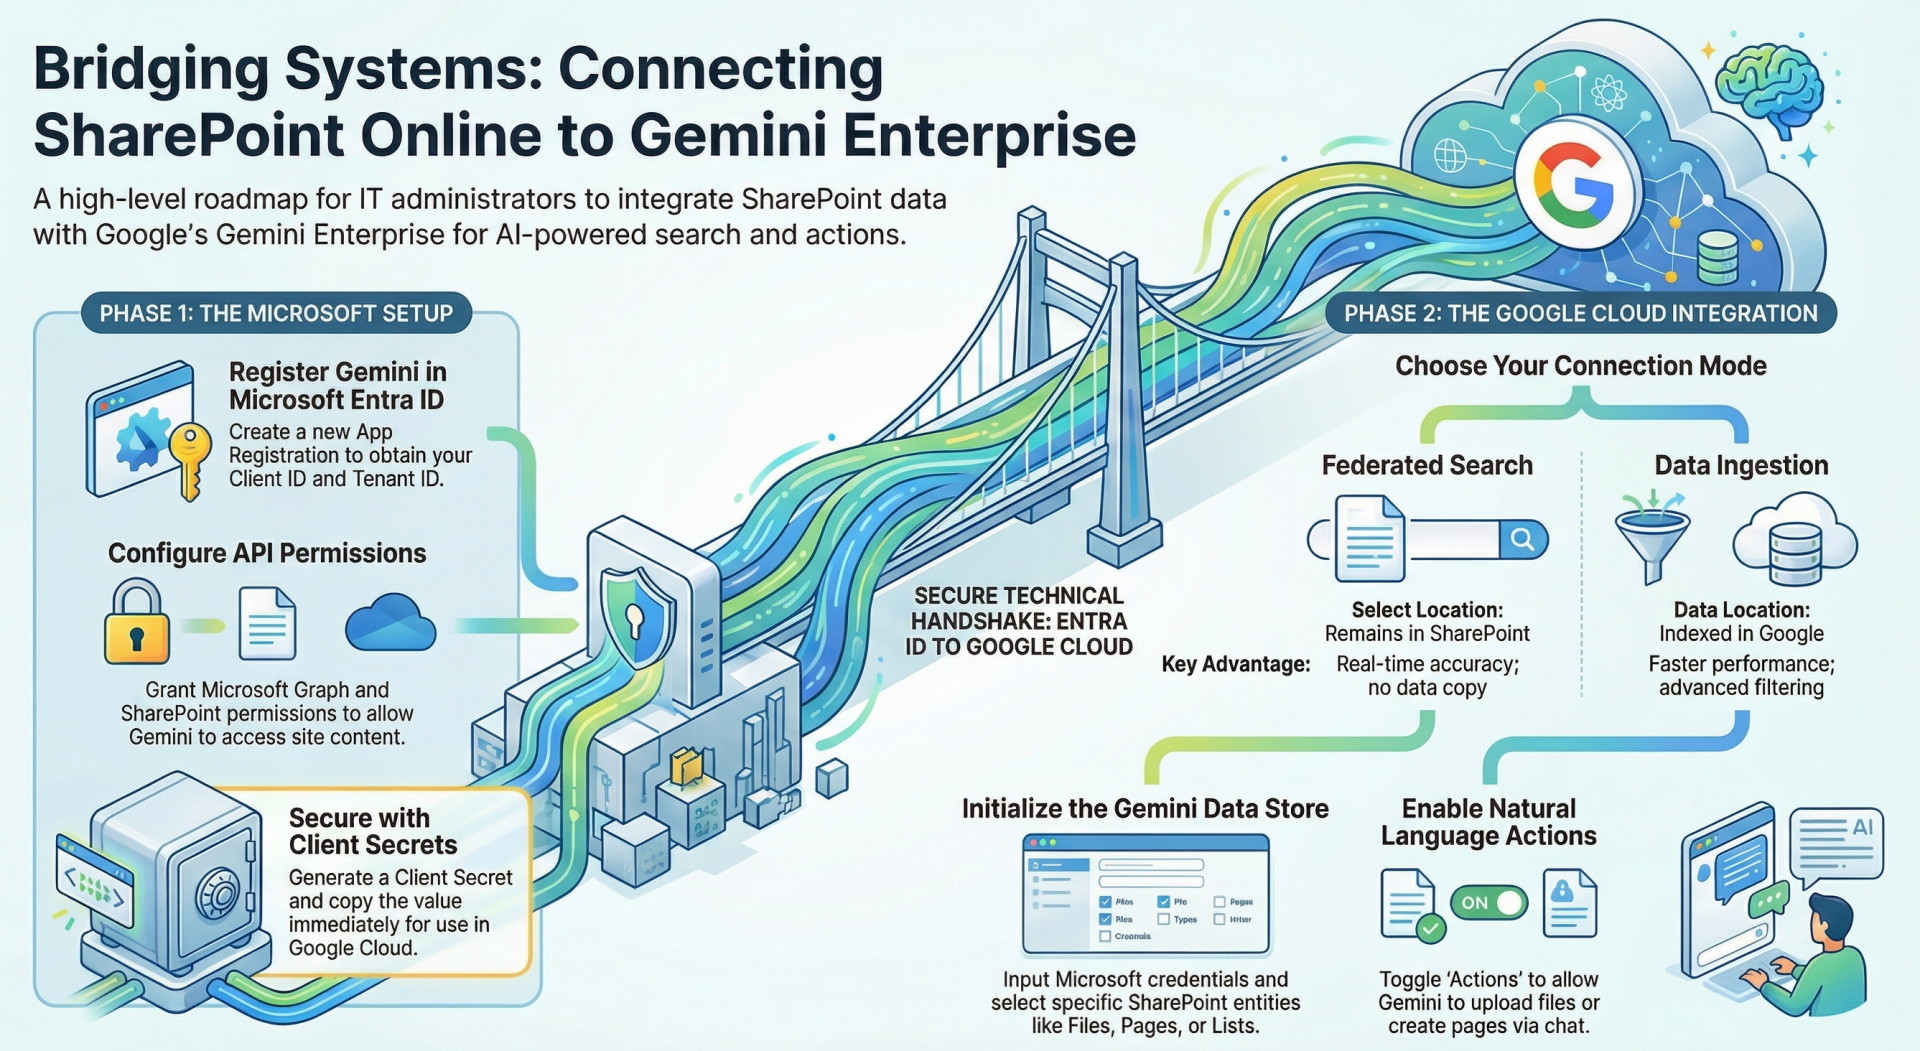
Using Gemini Enterprise Data Sources to Surface SharePoint Online Content. This document provides a step-by-step walkthrough for configuring Gemini Enterprise Data Sources (specifically the Microsoft SharePoint data store) to surface content from SharePoint Online sites. Once connected, Gemini Enterprise can search, retrieve, summarize, and perform actions on SharePoint content using natural language queries in the Gemini Enterprise app or custom agents.
Key benefits:
- Content remains secure and governed by your Microsoft permissions.
- Two connection modes: Federated search (real-time queries to SharePoint) or Data ingestion (periodic/full sync into Gemini’s index for advanced querying, with optional real-time sync).
- Supports actions such as uploading documents, creating pages, checking in/out files, etc.
- Supported: Latest Microsoft SharePoint Online (cloud version only).
1. Prerequisites (Before You Begin)
Google Cloud side:
- A Google Cloud project with Gemini Enterprise enabled.
- Grant the Discovery Engine Editor role (roles/discoveryengine.editor) to the user creating the data store:
- Go to the IAM page.
- Edit the user → Add role Discovery Engine Editor.
Microsoft side (must be completed first):
- Microsoft Entra admin center access.
- SharePoint admin permissions.
- Register Gemini Enterprise as an OAuth 2.0 app in Microsoft Entra ID (detailed in Step 2).
2. Configure Microsoft SharePoint / Microsoft Entra ID
- Step 2.1: Register the Microsoft Entra App
- Go to the Microsoft Entra admin center.
- Navigate to Entra ID → App registrations → New registration.
- Enter a Name (e.g., “Gemini Enterprise SharePoint Connector”).
- Select Accounts in this organizational directory only.
- Under Redirect URI:
- Platform: Web
- URI 1: https://vertexaisearch.cloud.google.com/console/oauth/sharepoint_oauth.html
- Click Register.
- On the app overview page:
- Copy the Application (client) ID (this is your Client ID).
- Go to Authentication → Add a platform → Web → Add second URI: https://vertexaisearch.cloud.google.com/oauth-redirect → Configure.
Step 2.2: Create a Client Secret
- Go to Certificates & secrets → New client secret.
- Add a description and expiry → Add.
- Copy the Value immediately (this is your Client secret — it will not be shown again).
Step 2.3: Obtain Tenant ID and Instance URI
- Tenant ID: From the app Overview page.
- Instance URI: Usually https://yourdomain.sharepoint.com (or https://yourdomain.sharepoint.com/sites/your-site for a specific site).
Step 2.4: Add API Permissions (Critical)Go to API permissions → Add a permission.
Microsoft Graph permissions (required based on mode):
- Always: GroupMember.Read.All (Application), User.Read (Delegated).
- Data ingestion (Federated credentials): Sites.FullControl.All or Sites.Selected (Application) + profile options.
- Data ingestion (OAuth): Additional User.Read.All (Application).
- Actions enabled:
- Sites.ReadWrite.All
- Files.ReadWrite.All
- Sites.Manage.All (Delegated).
Microsoft SharePoint permissions:
- Federated search: Sites.Search.All (Delegated) + AllSites.Read or Sites.Selected (Delegated).
- Data ingestion: Sites.FullControl.All or Sites.Selected (Application) or AllSites.FullControl (Delegated).
Grant admin consent for all permissions.
Step 2.5: (Data Ingestion + Federated Credentials Only) Add Federated Credential
- Go to Certificates & secrets → Federated credentials → Add credential.
- Scenario: Other issuer.
- Issuer: https://accounts.google.com.
- Subject identifier: Copy this value later from the Gemini console (during data store creation).
- Name the credential → Add.
3. Create the SharePoint Data Store in Gemini Enterprise
- Go to the Gemini Enterprise console.
- Select/create your Google Cloud project.
- Navigation → Data stores → Create data store.
- Source: Search and select Microsoft SharePoint → Select.
Data Section
- Choose Connector mode:
- Federated search (real-time, no data copy) or
- Data ingestion (syncs data into index; supports real-time sync).
- Authentication settings:
- Enter Client ID, Client secret, Tenant ID, Instance URI.
- For Data ingestion + Federated credentials: Copy the Subject identifier and add it as a federated credential in Entra ID (see Step 2.5).
- Click Continue.
- (Federated search only) Destinations → Enter base site URL(s).
- Advanced Options (Federated search) or via API: Add site/path filters (include/exclude specific sites or subpaths).
- Entities to search/sync:
- Select entities (Files, Pages, Lists, Attachments, etc.).
- For Data ingestion: Optionally filter specific entities (Include/Exclude) → Save.
- Sync schedule (Data ingestion only):
- Choose Sync frequency, Incremental sync frequency, and optional custom full sync.
- Actions (optional but powerful):
- Enable desired actions (Upload document, Create page, Check in/out, Rename/Move, etc.).
- Re-configure authentication if needed.
- Configuration:
- Select multi-region location (global/us/eu).
- Name the data store.
- Choose encryption (Google-managed or Cloud KMS).
- Billing: Select pricing tier → Create.
The data store will show Creating → Active (or Running then Active for ingestion). Ingestion can take hours depending on volume.
4. Enable Real-Time Sync (Data Ingestion Only)Real-time sync supports Create/Update/Delete for Files, Pages, etc. (not all entities).
- Go to Data stores → Click your data store.
- On the Data page, wait for Connector state = Active.
- In Real-time sync → View/edit → Toggle Enable real-time sync.
- Enter a strong Client secret (20+ characters) for webhook verification → Save.
5. Using the Data Store – Surfacing SharePoint Content
- Create or connect an App:
- In Gemini Enterprise, create a new app or edit an existing one.
- Connect the SharePoint data store.
- Authorize users (they will sign in with Microsoft credentials).
- Query and Surface Content:
- Open the Gemini Enterprise app.
- Ask natural-language questions, e.g.:
- “Summarize the latest project brief in the Marketing site.”
- “Find all documents containing ‘Q3 budget’ in the Finance library.”
- “Upload the latest report to the Projects site.”
- Gemini blends results with other data sources if connected.
- For federated search: Queries are sent live to Microsoft SharePoint API (results respect user permissions).
- For ingestion: Uses the indexed copy (faster, supports more advanced filtering).
- Actions: Gemini can perform SharePoint actions via natural language once enabled and authorized.
- Monitor & Manage:
- Check data store status, sync history, and errors in the console.
- Add filters via API for finer control (site/path inclusion/exclusion).
Important Notes & Limitations
- Only one data store per connector type can have actions enabled.
- Search results in federated mode depend on the querying user’s SharePoint permissions.
- Archived/encrypted content or certain attachments may have limited support.
- VPC Service Controls require recreation of existing data stores.
- Always test with a small set of sites first.
Official References
- Set up Microsoft SharePoint data store
- Microsoft SharePoint configuration (Entra & permissions)
- Overview of SharePoint data store
This setup is complete and secure. Your SharePoint Online content is now fully surfaced and actionable inside Gemini Enterprise. For custom agents or advanced filtering, refer to the Gemini Enterprise documentation on app creation and data connectors.