This article provides an overview of sensitivity labels in SharePoint Online. It covers their definition, usage, application contexts, benefits, and real-life examples.
Sensitivity labels are a key component of Microsoft Purview Information Protection, helping organizations classify and safeguard data without impeding collaboration.
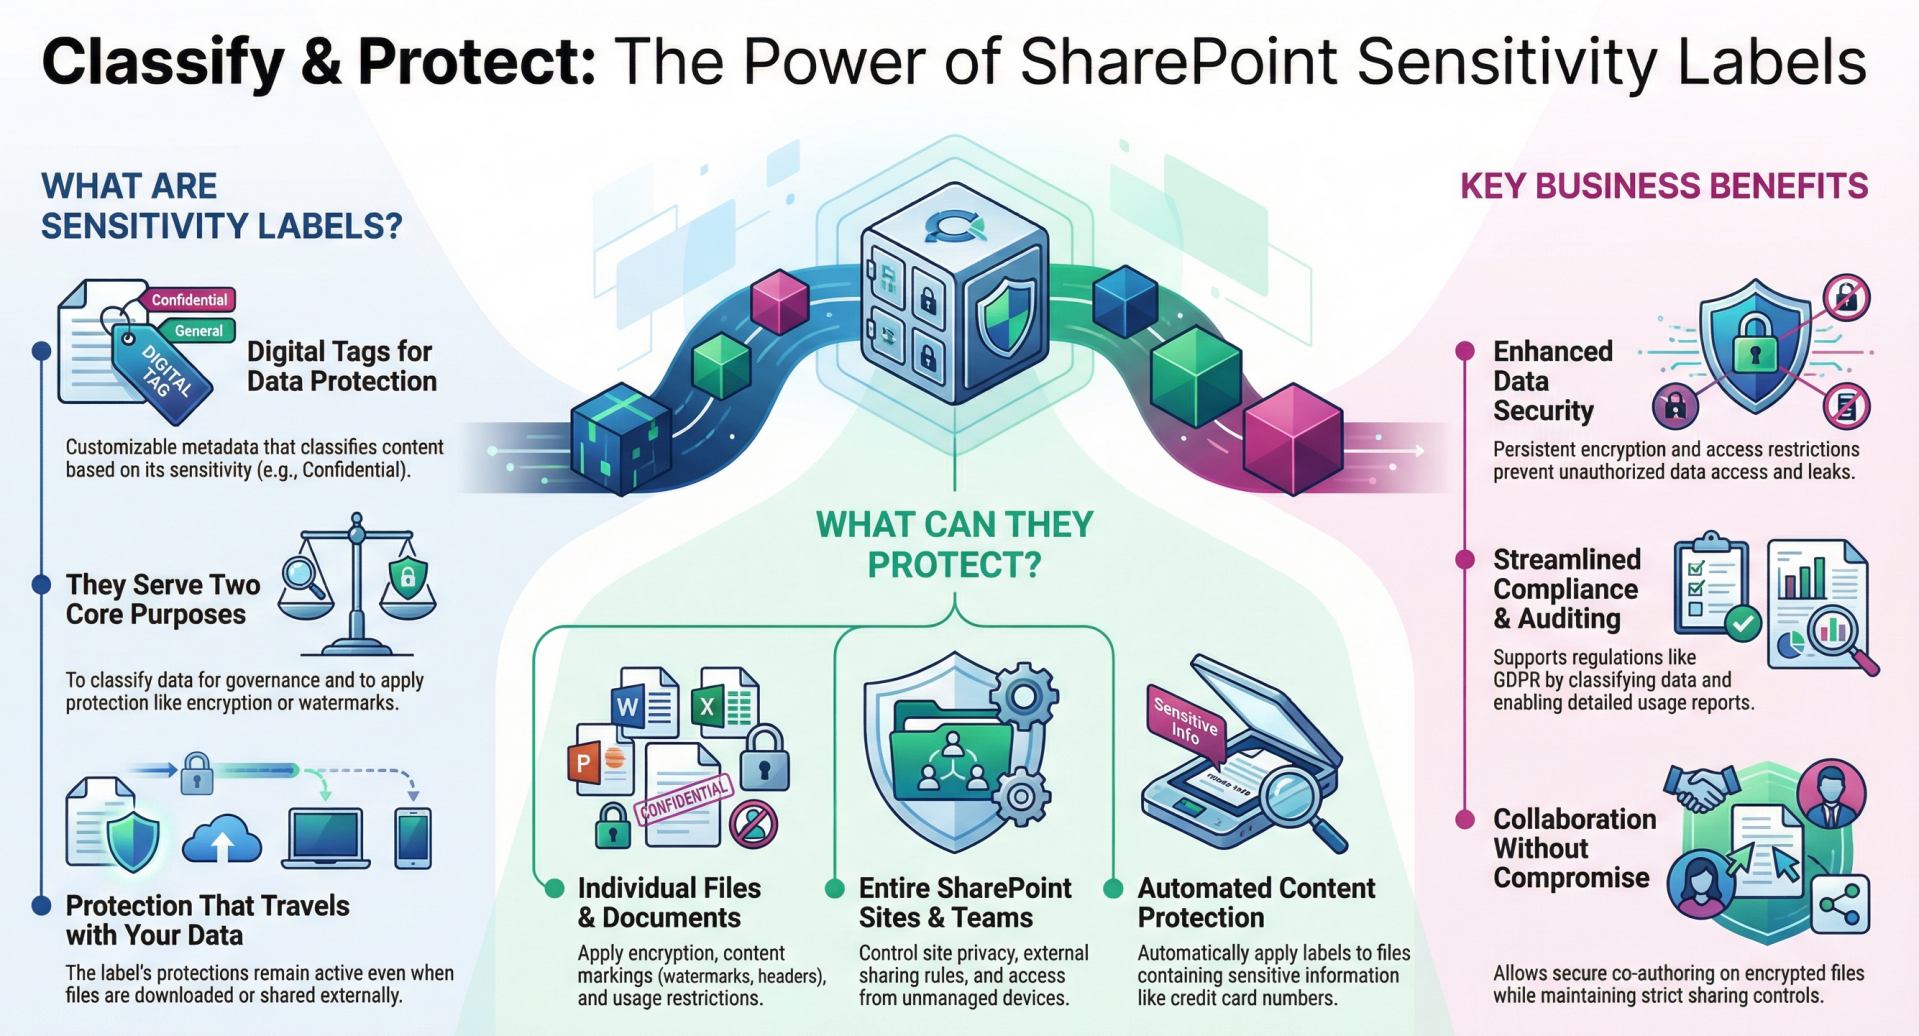
What Are Sensitivity Labels?
Sensitivity labels are customizable, persistent metadata tags applied to content, such as documents and emails, or containers like SharePoint sites. They classify data based on its sensitivity level (e.g., Public, General, Confidential, Highly Confidential) and enforce protection mechanisms to ensure appropriate handling. These labels are stored in clear text within the file's metadata, making them durable across devices, apps, and services, even when files are downloaded or shared.
At their core, sensitivity labels serve two main purposes:
- Classification: They categorize data to indicate its sensitivity, aiding in compliance, auditing, and data governance.
- Protection: They can automatically apply settings like encryption, content markings (e.g., watermarks, headers, footers), access restrictions, and usage controls (e.g., preventing printing or copying).
In SharePoint Online, sensitivity labels extend beyond individual files to protect entire sites or document libraries, integrating with features like co-authoring, search, eDiscovery, and data loss prevention (DLP). They are part of Microsoft 365's broader ecosystem, supporting integrations with tools like Microsoft Teams, OneDrive, Power BI, and even Microsoft 365 Copilot for AI-driven protections.
Labels can be hierarchical, with parent labels (e.g., "Confidential") and sublabels (e.g., "Confidential \ All Employees") for nuanced classifications. They do not replace traditional permissions but complement them by adding persistent, policy-driven safeguards.
How to Use Sensitivity Labels
Using sensitivity labels involves creation, configuration, publishing, and application. This process requires administrative access to the Microsoft Purview portal and may involve PowerShell for advanced setups.
Step 1: Create and Configure Sensitivity Labels
- Sign in to the Microsoft Purview portal (https://purview.microsoft.com/) and navigate to Solutions > Information Protection > Sensitivity labels.
- Select + Create a label.
- Provide a name, display name, description for users, and optional color or icon.
- Define the scope: Select Files & other data assets (for documents), Emails (if needed), Groups & sites (for SharePoint sites), and/or Meetings (requires Files and Emails scopes).
- Configure protection settings based on scope:
- For files/documents: Enable encryption (specify permissions like View, Edit, Print), content markings (headers, footers, watermarks), auto-labeling conditions (e.g., based on sensitive info like credit card numbers), or endpoint DLP restrictions.
- For sites/containers: Set privacy (Public, Private, None), external user access, external sharing levels (e.g., Anyone, Existing guests only), Conditional Access for unmanaged devices (block or limit access), authentication contexts (e.g., require MFA), default sharing link types, and member sharing restrictions (e.g., owners only can share).
- Set label priority (higher priority overrides lower ones in conflicts) and advanced options like multilingual support via PowerShell.
- Review and create the label. For sublabels, select a parent label and choose Create sublabel.
- Optionally, group labels for better organization: Select + Create > Label group, then move labels into it.
Changes can take up to 24 hours to propagate. Use PowerShell (e.g., Set-Label) for locale-specific settings or advanced configurations like site sharing permissions.
Step 2: Publish Labels via Policies
- In the Purview portal, go to Publishing policies > + Publish labels.
- Select the labels to publish.
- Assign to users/groups (or full directory) and administrative units if applicable.
- Configure policy settings: Default labels (e.g., for new documents or sites), mandatory labeling (require before saving/sending/creating), justification for downgrading labels, and help links.
- Set policy priority (higher order overrides conflicts).
- Review and publish.
- Edit policies as needed, and use PowerShell (e.g., Set-LabelPolicy) for fine-tuning.
Step 3: Enable Sensitivity Labels in SharePoint Online
- For files/documents: In the Purview portal under Sensitivity labels, select Turn on now if prompted. Alternatively, use PowerShell: Connect to SharePoint Online (Connect-SPOService) and run Set-SPOTenant -EnableAIPIntegration $true. For PDF support: Set-SPOTenant -EnableSensitivityLabelforPDF $true.
- For sites/containers: Enable in Microsoft Entra ID (assign labels to groups) and synchronize via PowerShell: Execute-AzureAdLabelSync.
Step 4: Apply Sensitivity Labels
- To Documents: In Office for the web (via SharePoint), click the Sensitivity button on the ribbon. In desktop apps, use the Sensitivity menu. Auto-apply via policies or upload pre-labeled files. In SharePoint libraries, apply from the details pane or Teams Files tab.
- To Document Libraries: Navigate to library > Settings > Library settings > Default sensitivity labels, select a label. This applies to new/unlabeled files and can extend protection to downloads.
- To Sites: During creation, select under Advanced settings. For existing sites: In SharePoint admin center > Active sites > Policies tab > Edit Sensitivity, or via PowerShell (Set-SPOSite -Identity <URL> -SensitivityLabel "<GUID>").
- To Lists: Sensitivity labels do not apply directly to lists or list items (unless items are documents/attachments). However, lists inherit site-level protections, and attachments can be labeled individually.
Monitor usage via audit logs (e.g., "Applied sensitivity label to file") and reports in Purview.
Where to Use Sensitivity Labels
Sensitivity labels are versatile in SharePoint Online:
- Documents and Files: Ideal for individual items in libraries or lists with attachments. Use for encryption, markings, and restrictions in co-authoring scenarios.
- Document Libraries: Set defaults to auto-label new content, extending protections to downloaded files. Useful for team-specific repositories (e.g., HR docs).
- Lists: Indirectly via site labels or labeled attachments. Not for non-document list items.
- Sites: Apply to entire SharePoint sites (team or communication) to control privacy, sharing, device access, and discoverability. Integrates with Teams-connected sites.
Avoid using for non-supported formats (e.g., signed PDFs, password-protected files) or where co-authoring is blocked (e.g., on-premises keys).
Benefits of Using Sensitivity Labels
- Enhanced Data Protection: Persistent encryption and restrictions prevent unauthorized access, even outside SharePoint (e.g., downloaded files).
- Compliance and Auditing: Supports regulations like GDPR by classifying data, enabling eDiscovery searches (e.g., by label GUID), and generating usage reports.
- Collaboration Without Compromise: Enables co-authoring on encrypted files in Office for the web, while controlling sharing (e.g., default internal-only links).
- Centralized Management: Policies ensure consistent application across users/sites; integrates with Conditional Access for advanced controls (e.g., MFA for unmanaged devices).
- Scalability: Auto-labeling reduces manual effort; container-level labels simplify site governance.
- Cost-Effective Security: Replaces older tools like SharePoint IRM, with no hindrance to productivity.
Real-Life Examples of Sensitivity Labels in SharePoint Online
- Example 1: Protecting Board Presentations in a Corporate Site - In a large organization, a SharePoint site for the Board of Directors uses a "Highly Confidential" site label to set Private privacy, block external sharing, and require MFA via Conditional Access. A document library within the site has a default "Highly Confidential" label for files, applying encryption and watermarks. If a critical presentation is accidentally emailed or saved to an accessible library, the label prevents unauthorized viewing, ensuring only board members can access it.
- Example 2: Securing HR Documents in a Team Site - An HR department's SharePoint site (connected to Teams) applies a "Confidential \ Internal" label, allowing internal sharing but restricting external guests and unmanaged devices. The employee records library defaults to this label, auto-encrypting uploaded resumes or performance reviews. This prevents data leaks during collaboration, while audit logs track label applications for compliance reviews.
- Example 3: Auto-Labeling Customer Data in a Sales Library - A sales team's document library uses auto-labeling policies to detect sensitive info (e.g., customer numbers via regex patterns like "AA-#####"). Files matching this are labeled "Confidential \ External," enabling controlled sharing with partners but encrypting content. In one case, a strategy document with customer data was uploaded; the label ensured it remained protected even if shared externally.
- Example 4: Research Project Site with Tiered Access - A university research site applies a "Confidential" label to restrict discovery and limit sharing to internal users only. Sub-libraries for data sets use default sublabels (e.g., "Confidential \ All Employees") for documents, adding watermarks and print restrictions. This setup protected sensitive grant proposals during multi-user editing, integrating with eDiscovery for quick label-based searches.
These examples illustrate how sensitivity labels adapt to various workflows, enhancing security in pages (via site protections), lists (via attachments), and libraries. For implementation, consult your Microsoft 365 admin and test in a pilot environment.