In SharePoint Online, image editing features are primarily integrated into modern pages, document libraries, and specific web parts, allowing users to enhance and customize images directly within the platform. These features are designed to be user-friendly, eliminating the need for external editing software for basic modifications.
Below is a comprehensive overview of all the image editing features available in a SharePoint Online site, based on the latest information and the context provided.
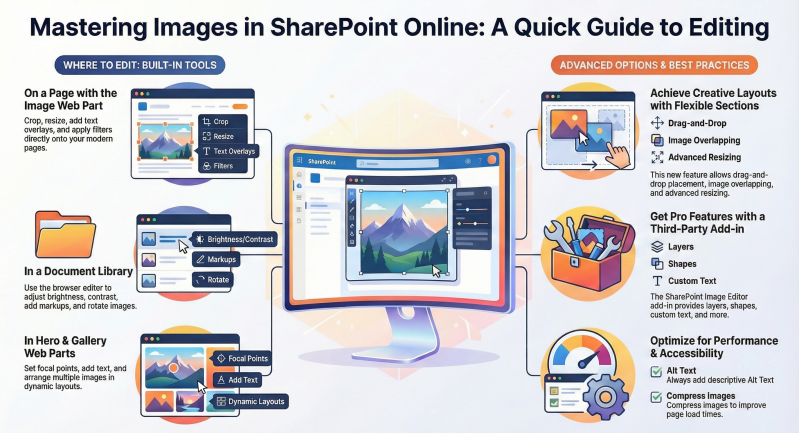
1. Image Web Part Editing Features
The Image Web Part is a core component for adding and editing images on modern SharePoint pages. It offers several built-in editing capabilities to enhance visual content.
- Adding Images:
- Sources: Add images from your local computer, a SharePoint library (e.g., Site Assets or Picture Library), a web search (Bing images with Creative Commons licensing), or an organization’s approved asset library.
- Methods: Drag-and-drop an image onto the page or select it via the Image Web Part’s Toolbox after clicking Edit on the page. You can also paste an image using CTRL+V.
- Cropping:
- Options: Crop images with or without preset aspect ratios (e.g., 16:9, 4:3, 3:2, 1:1). A preview box shows the cropped area, and you can move the crop box to adjust the focus.
- Process: In Edit mode, select the image to open the image toolbar, then choose Crop to adjust the framing.
- Resizing:
- Functionality: Resize images by dragging handles on the image borders or using the Resize button on the image toolbar. This allows you to adjust the image size to fit the page layout.
- Limitation: Resizing is not available in SharePoint Server 2019, but it is fully supported in SharePoint Online.
- Text Overlay:
- Feature: Add text directly over an image for headers, announcements, or captions. In Edit mode, select the Image Web Part, click Add text over the image, and enter text in the appearing text box.
- Use Case: Ideal for creating banners or highlighting key messages on images.
- Adjustments:
- Options: Modify brightness, contrast, and saturation to enhance or blend the image with the page design. Access these via the Advanced editing option in the Image Web Part.
- Filters:
- Options: Apply artistic filters (e.g., grayscale, blur, black & white, vintage) for branding or aesthetic effects. Filters are available under Advanced editing in the Image Web Part.
- Borders and Styles:
- Feature: Add borders to images via the Styles group on the Image tab in the ribbon. Choose from predefined border styles to enhance visual appeal.
- Customization: Adjust border thickness or style to align with branding.
- Alt Text:
- Feature: Add or edit descriptive alternative text (Alt Text) for accessibility, ensuring screen readers can describe the image to visually impaired users. Suggested Alt Text may appear automatically, but you can customize it in the Properties group of the Image tab.
- Best Practice: Use meaningful descriptions to comply with accessibility standards (e.g., ISO-9241-3 recommends a 3:1 contrast ratio for text over images).
- Replace Image:
- Functionality: Replace an existing image by selecting the Image Web Part in Edit mode, choosing Change Picture from the Image tab, or dragging a new image over the existing one.
- Note: Ensure the new image is copied to the Site Assets library to guarantee visibility for all users.
- Hyperlinks:
- Feature: Add a hyperlink to an image to link to a webpage, site, or other media. In the Image tab, use the Add Hyperlink dialog to enter the URL and test it with the Try out option.
- Undo/Reset:
- Feature: Undo all changes made to an image during the current editing session, reverting it to its last saved state, using the Undo option in the image toolbar.
2. Document Library Image Editing Features
SharePoint Online document libraries and OneDrive for Business integration offer robust image editing capabilities directly within the browser, introduced as a significant update for modern sites.
- Accessing the Editor:
- Navigate to a document library, select an image, and click the Edit button in the top bar to open the image editor.
- Crop and Rotate:
- Options: Crop images using freeform or preset aspect ratios (e.g., 1:1, 4:3). Rotate images using controls at the bottom of the editor. Move the image within the crop box to adjust the focus.
- Presets: Includes options like 1:1, 2:2, or 4:4 for quick cropping.
- Adjustments:
- Options: Modify brightness, exposure, contrast, and saturation using sliders in the editor. Zoom controls are available at the top for precise adjustments.
- Use Case: Enhance image visibility or align with branding guidelines.
- Filters:
- Options: Apply quick filters (e.g., sepia, grayscale) for stylistic effects without needing advanced editing skills.
- Markup:
- Feature: Draw or write on images using various pen types, colors, and brush styles. This is useful for annotations or highlighting specific areas.
- Reset Option: Undo markup mistakes with the Reset button.
- Saving Options:
- Save: Overwrite the original image in the document library.
- Save As: Save a new version of the edited image in the same library to preserve the original. An uploading prompt appears when saving as a copy.
3. Picture Library Features
SharePoint’s Picture Library is a specialized library for managing and displaying images, with some editing-related capabilities.
- Editing Properties:
- Options: Edit image metadata such as File Name, Title (caption), or other custom properties to differentiate images in the library. Access these via the Edit Item option in the ribbon (Thumbnail view) or the ellipses (…) menu in All Pictures view.
- Use Case: Useful for organizing images or adding captions for clarity.
- External Editing:
- Process: Use Open with Explorer to open the Picture Library in Windows Explorer, then edit images using external tools like Paint, Photoshop, or GIMP. Save changes back to the library, and refresh to see updates.
- Limitation: This method requires external software and is less integrated than the browser-based editor.
- Slide Show View:
- Feature: View images in a slide show format directly from the Picture Library, which can be linked to pages or wikis for dynamic display.
- Use Case: Useful for presentations or showcasing event photos.
4. Image Gallery Web Part
The Image Gallery Web Part allows you to display multiple images on a page with some editing and customization options.
- Adding Images:
- Source images from a document library (with an option to include subfolders) or upload them directly into the web part.
- Configure the number of images displayed at once.
- Display Options:
- Layouts: Choose from Brick, Grid, or Carousel layouts. The Carousel requires users to cycle through images manually.
- Customization: Add text overlays or hyperlinks to images for navigation or captions.
- Editing: While the Image Gallery Web Part itself does not offer direct image editing, you can edit images in the source document library using the browser-based editor before displaying them.
5. Hero Web Part Image Editing
The Hero Web Part is often used on homepages to showcase images with text overlays, offering limited but specific editing features.
- Image Selection:
- Add images from your site, computer, web search, or organization’s asset library. Set a focal point to ensure the key part of the image remains visible across devices.
- Layouts:
- Choose Tiles (3–5 images with text overlays) or Layers (up to 5 layered images with text boxes). Customize text color and background for accessibility.
- Editing:
- Crop and resize images within the Hero Web Part to fit the layout. Adjust the focal point to optimize for different screen sizes.
6. Flexible Sections Image Editing (New Feature)
Introduced in January 2025 for Targeted Release, Flexible Sections enhance image editing within modern pages by allowing more dynamic layouts.
- Image Placement and Resizing:
- Place images anywhere within a 12-column grid using drag-and-drop. Resize images using handles, with non-card-based images (e.g., Image Web Part) offering flexible widths constrained by the grid or aspect ratio.
- Card-based web parts (e.g., Hero) are limited to four width options (full, 1/3, 1/2, 2/3 canvas width).
- Overlapping Images:
- Overlap images with other web parts (e.g., text over images) for creative designs. Adjust z-order (bring to front/send to back) via the web part toolbar.
- Mobile Responsiveness:
- Images in Flexible Sections stack vertically on mobile devices. Authors can configure reordering (top-to-bottom or left-to-right) via the Section Properties pane.
- Templates:
- Use pre-designed Flexible Section Templates that include images for quick setup, customizable with the above editing features.
7. SharePoint Image Editor Add-In (Third-Party)
The SharePoint Image Editor add-in, available from the Microsoft AppSource, provides advanced image editing capabilities within SharePoint Online.
- Access: Install from the Office Store or AppSource. Access it from Site Contents or via the image’s context menu (Image Editor – Free or Image Editor).
- Features:
- Image Manipulation: Resize, crop, rotate, and transform images.
- Filters: Apply grayscale, blur, black & white, vintage, and more.
- Frames: Add responsive frames to images of any size.
- Draw: Use a free drawing tool with multiple brush types and colors, supporting mouse and touch.
- Text: Add text with hundreds of Google Fonts.
- Shapes and Stickers: Add shapes, stickers, patterns, and gradients, each on its own layer for easy editing.
- Layers: Manage objects (text, shapes, stickers) on separate layers for non-destructive editing.
- Zoom and Pan: Zoom and pan the canvas using mouse or touch gestures.
- History: Undo/redo actions via a history tool.
- Saving Options: Save as PNG, JPG, or an Editor Project File for future edits.
- Benefits: No external software required, fully integrated with SharePoint, and supports editing directly from libraries.
- Limitations: The free trial adds a watermark; a licensed version is required for full functionality. No ribbon button in document libraries, only accessible via the context menu.
8. Page Title Area and Thumbnail Editing
- Thumbnail Customization:
- Edit the page thumbnail in the Page Details pane to change the image used in search results or news feeds. Select from recent images, stock images, your site, or a link.
- Best Practice: Use images with a 16:9 aspect ratio and at least 1 MB for optimal display.
- Title Area Image:
- Customize the title area with an image, choosing from four layouts. Edit the image using the same cropping and focal point tools as the Hero Web Part.
9. Accessibility and Performance Features
- Accessibility:
- Add Alt Text to all images to ensure compliance with accessibility standards. SharePoint provides suggested Alt Text, which can be edited.
- Ensure a 3:1 contrast ratio for text over images to support users with visual impairments.
- Performance Optimization:
- Use the Page Diagnostics for SharePoint browser extension to identify large images (>300 KB) that may slow page load times. Optimize images before uploading to avoid automatic resizing issues.
- Enable a Content Delivery Network (CDN) to improve image loading performance, configurable by SharePoint admins.
- Image Sizing and Scaling:
- SharePoint automatically scales images for responsiveness across devices, using renditions to adjust size based on browser window and resolution. Use 16:9 or 4:3 aspect ratios for best results in modern web parts.
Best Practices for Image Editing in SharePoint Online
- Optimize Images Before Upload: Compress images to under 300 KB to improve page load times. Use tools like TinyPNG or Photoshop externally if needed.
- Use Organizational Asset Libraries: Store approved images in a designated asset library to ensure consistency and accessibility.
- Ensure Accessibility: Always add descriptive Alt Text and check color contrast for text overlays.
- Test Responsiveness: Preview pages on desktop, tablet, and mobile to ensure images display correctly, especially in Flexible Sections.
- Leverage Flexible Sections: Use the new Flexible Sections for creative layouts, but avoid overcomplicating designs to maintain performance.
- Use Templates: Start with Flexible Section Templates or pre-configured web parts to streamline design.
- Backup Originals: Save edited images as copies in document libraries to preserve originals.
- Consider Third-Party Add-Ins: Use the SharePoint Image Editor for advanced editing needs, but evaluate costs and licensing for your organization.
Limitations
- Basic Editing Scope: SharePoint’s built-in tools are limited to basic edits (crop, resize, filters, text). For advanced editing (e.g., layers, complex effects), use the SharePoint Image Editor add-in or external tools.
- Flexible Section Constraints: Overlapping images don’t render on mobile, and some web parts don’t support transparent backgrounds.
- Dynamic Resizing Issues: Custom web parts with dynamic resizing may overflow Flexible Sections; fixes are expected post-February 2025.
- No Ribbon Button for Add-In: The SharePoint Image Editor lacks a direct ribbon button, requiring context menu access.
Conclusion
SharePoint Online offers robust image editing features through the:
- Image Web Part (crop, resize, text overlay, filters, borders, Alt Text)
- Document Library editor (crop, rotate, adjustments, filters, markup)
- Picture Library (metadata editing, external editing)
- Image Gallery Web Part (layout customization)
- Hero Web Part (focal point, layouts)
- Flexible Sections (grid-based placement, overlap, mobile reordering)
- The SharePoint Image Editor add-in provides advanced capabilities like layers, shapes, and stickers.
By optimizing images, using asset libraries, and ensuring accessibility, you can create visually appealing, performant pages. For more details, refer to Microsoft’s documentation at:
https://support.microsoft.com or the SharePoint Community Blog at https://techcommunity.microsoft.com.