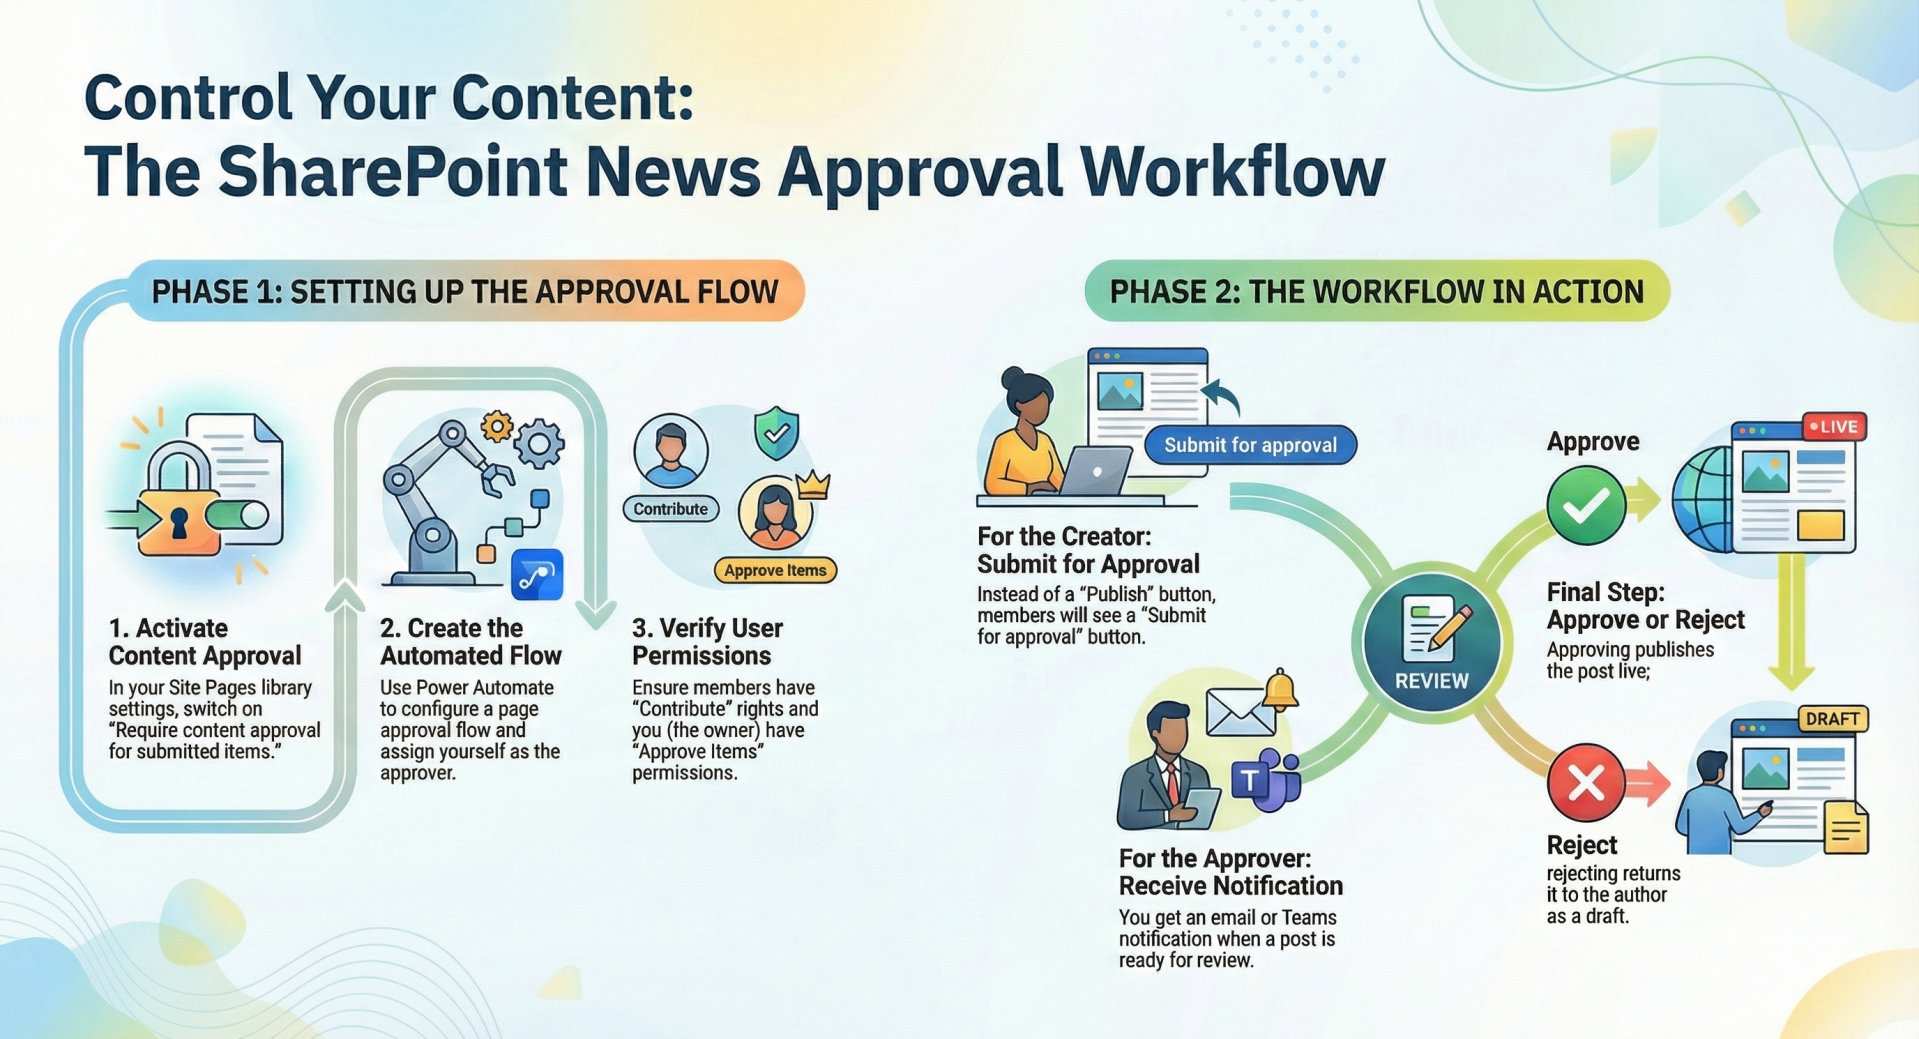
As the site owner in SharePoint Online, you can configure a page approval flow using Power Automate to ensure that only you can approve and publish news posts created by site members.
Below are the steps to set this up:
- Enable Content Approval in the Site Pages Library:
- Navigate to your SharePoint site and go to Site Contents > Site Pages library.
- Click the Settings gear icon in the top-right corner and select Library settings.
- Under General Settings, select Versioning settings.
- In the Content Approval section, set Require content approval for submitted items? to Yes.
- In the Draft Item Security section, choose Only users who can approve items to ensure only you and the author can see draft news posts.
- Click OK to save changes.
- Set Up a Page Approval Flow with Power Automate:
- In the Site Pages library, click Automate in the toolbar, then select Power Automate > Configure page approval flow.
- In the side panel, click Create flow.
- Sign in to any connectors that require authentication and click Continue.
- Provide a Flow name (e.g., "News Approval Flow").
- In the Approvers field, enter your email address to designate yourself as the sole approver.
- Click Create to generate the flow. This creates an automated Power Automate flow that routes news posts for your approval.
- Ensure Proper Permissions:
- Verify that site members have Contribute permissions, which allow them to create and edit news posts but not approve them.
- Go to Site Settings > Site Permissions > Advanced permission settings.
- Ensure the Members group has Contribute permissions (default for members).
- Confirm that you, as the site owner, have Full Control or a custom permission level that includes Approve Items. If needed, create a custom permission level:
- Go to Site Permissions > Permission Levels > Read > Copy Permission Level.
- Name it (e.g., "Read with Approve") and select Approve Items under List Permissions.
- Assign this to yourself or the Owners group for the Site Pages library via Library Settings > Permissions for this document library.
- How It Works for Members:
- When a site member creates a news post, they’ll see a Submit for approval button instead of Publish.
- They must authenticate to the SharePoint connector and provide a message for you (the approver) before submitting.
- The post will be in Pending status, visible only to the author and you (the approver).
- How It Works for You (Approver):
- You’ll receive an email notification and/or a notification in the Approvals app in Microsoft Teams when a news post is submitted.
- You can approve or reject the post directly from the email (if your client supports actionable messages) or by opening the post in SharePoint.
- If approved, the post is published and becomes visible to all users with read access. If rejected, it reverts to draft status, and the author is notified.
Benefits:
- Ensures only you, as the site owner, can approve and publish news posts, maintaining content quality.
- Members can still create posts, fostering collaboration while you retain control.