Uploading Files to a SharePoint Online Document Library
SharePoint Online, a component of Microsoft 365, provides a secure and collaborative platform for storing, organizing, and sharing documents within document libraries. Uploading files to these libraries is a fundamental operation that can be accomplished through multiple methods, each suited to different user scenarios, such as individual uploads, bulk operations, or integration with other tools. Here are the primary approaches to uploading files, drawing from established Microsoft practices.
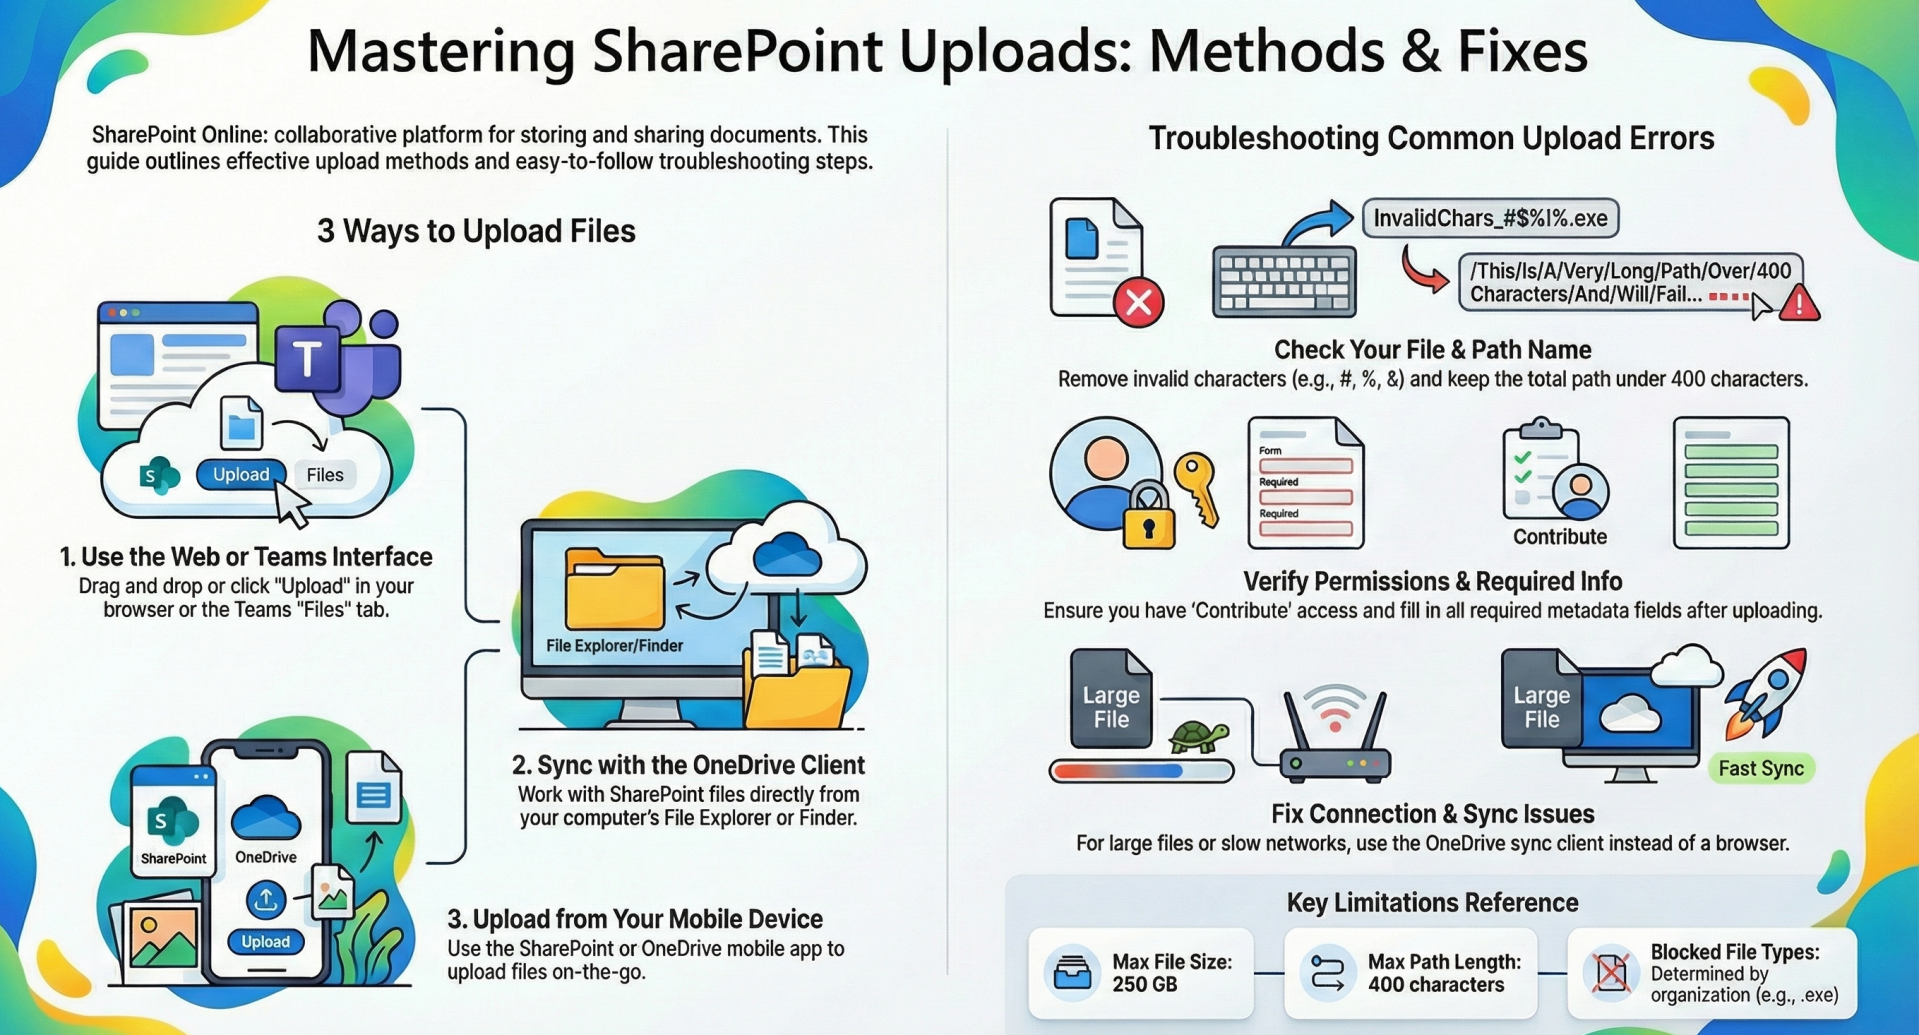
Method 1: Web Browser Interface
The most straightforward method involves using the SharePoint Online web interface via a supported browser, such as Microsoft Edge, Google Chrome, or Mozilla Firefox.
- Navigate to the SharePoint site and open the desired document library.
- Click the "Upload" button in the command bar.
- Select "Files" or "Folder" from the dropdown menu.
- Browse your local device to choose the file(s) or folder(s) and confirm the upload.
This approach supports drag-and-drop functionality: users can select files from their file explorer and drag them directly into the library view in the browser. It is ideal for occasional uploads and allows for metadata entry or version control during the process. Limitations include browser-specific file size restrictions, typically up to 250 GB per file, depending on the configuration.
Method 2: OneDrive Sync Client
For seamless integration with local file systems, the OneDrive sync client enables synchronization of SharePoint document libraries to a user's computer, allowing uploads via familiar file management tools.
- Install the OneDrive desktop app if not already present.
- Sign in to SharePoint Online and select the document library.
- Click "Sync" in the command bar to initiate synchronization.
- Once synced, the library appears as a folder in File Explorer (Windows) or Finder (macOS).
- Copy or move files into this synced folder; changes upload automatically to SharePoint.
This method is particularly effective for frequent users working offline or handling large volumes of files, as it supports background syncing and conflict resolution. Note that sync requires sufficient local storage space and may introduce delays in propagation for very large libraries.
Method 3: Microsoft Teams Integration
If the document library is associated with a Microsoft Teams channel, files can be uploaded directly through the Teams application.
- Open Microsoft Teams and navigate to the relevant team and channel.
- Access the "Files" tab, which links to the underlying SharePoint library.
- Click "Upload" and select files from your device, or drag and drop them into the tab.
This integration facilitates collaborative workflows, as uploaded files become immediately accessible to team members. It is best suited for team-based environments where discussions and document sharing occur concurrently.
Method 4: Mobile Applications
SharePoint Online supports uploads via dedicated mobile apps for iOS and Android devices.
- Download and install the SharePoint or OneDrive mobile app from the respective app store.
- Sign in with your Microsoft 365 credentials.
- Navigate to the site and document library.
- Tap the "+" or "Upload" icon, then select files from your device's storage, camera, or other apps.
This method is convenient for on-the-go users, enabling uploads from photos, scans, or cloud-connected sources. File size limits align with web uploads, and metadata can be added post-upload.
Method 5: Programmatic and Automated Methods
For advanced scenarios, such as bulk uploads or integrations, programmatic tools and APIs provide automation capabilities.
- Microsoft Power Automate: Create flows to upload files from various sources (e.g., email attachments or forms) to SharePoint. Triggers can automate the process based on events.
- SharePoint REST API or Microsoft Graph API: Developers can use these APIs to programmatically upload files via custom scripts or applications. For instance, using PowerShell cmdlets like Add-PnPFile in the PnP PowerShell module.
- File Explorer View (Legacy): In Internet Explorer (or Edge in IE mode), open the library in "Explorer view" to upload via copy-paste, though this is deprecated and not recommended for modern browsers.
These methods require technical expertise and are suitable for IT administrators or developers managing large-scale operations. Ensure compliance with organizational security policies when using APIs.
Best Practices and Considerations
- File Size and Limits: SharePoint Online supports files up to 250 GB. For larger files, consider breaking them into parts or using alternative storage solutions.
- Permissions: Verify that users have at least "Contribute" permissions to upload files.
- Versioning and Metadata: Enable library versioning to track changes, and encourage adding metadata for better organization.
- Security: Use multi-factor authentication and monitor sharing settings to prevent unauthorized access.
- Troubleshooting: Common issues include network connectivity; in such cases, retry uploads or use the sync client for reliability.
By selecting the appropriate method based on context—whether manual, collaborative, mobile, or automated—users can efficiently manage document uploads in SharePoint Online, enhancing productivity and collaboration. For the latest updates, consult Microsoft's official documentation.
Troubleshooting Upload Errors in SharePoint Online Document Libraries
Introduction
Uploading files to SharePoint Online document libraries is generally reliable, but errors can occur due to file properties, permissions, network conditions, or system configurations. This document outlines common upload errors, their likely causes, and step-by-step troubleshooting solutions. The guidance is based on Microsoft’s official documentation and best practices as of January 2026. Users should possess at least "Contribute" permissions in the target library. For persistent issues, consult the SharePoint admin center or Microsoft support.
Current SharePoint Online Upload Limits
- Maximum file size: 250 GB per individual file.
- Maximum path length: 400 characters (decoded URL, including site, library, folders, and file name).
- Restricted characters in file/folder names: ", #, %, &, *, :, <, >, ?, /, , |, ~, and leading/trailing spaces or periods. (Note: # and % are supported in most tenants if enabled by administrators.)
- Blocked file types: Determined by organizational policy (e.g., .exe, .dll); check with your SharePoint administrator.
- Simultaneous uploads: No strict limit, but performance may degrade with many files.
Exceeding these limits is a frequent cause of failures.
Common Upload Errors and Troubleshooting Steps
1. "Sorry, there was a problem uploading this file" or "Sorry, your files couldn't be uploaded"
Causes: Invalid file name characters, path too long, blocked file type, network interruption, or content issues (e.g., embedded media in PowerPoint).
Solutions:
- Rename the file to remove restricted characters and ensure the full path is under 400 characters.
- Verify the file type is not blocked (SharePoint Admin Center > Settings > Sync).
- Try uploading a different file to isolate the issue.
- Use drag-and-drop in Microsoft Edge or Google Chrome.
- Clear browser cache or test in private/incognito mode.
2. "Upload failed: The specific path wasn't found on the server or permission was denied"
Causes: Sync client conflicts, especially with Office applications. Solutions:
- Right-click the OneDrive sync icon > Settings > Office tab > Uncheck "Use Office to sync Office files that I open."
- Pause and resume sync, or unlink and re-sync the library.
- Upload directly via the web interface instead of the synced folder.
3. Upload stalls, resets, or shows "Error in the application"
Causes: Unstable network, large files, or browser limitations. Solutions:
- Use the OneDrive sync client for files over 10 GB or bulk uploads.
- Switch networks (e.g., from Wi-Fi to wired) or test on another device.
- Upload one file at a time to identify problematic items.
- Monitor progress via the "Progress" panel in the SharePoint command bar for detailed error messages.
4. "Properties are missing or invalid" or no prompt for required metadata
Causes: Required columns in the library without provided values. Solutions:
- After upload, select the file > Details pane > Enter values for required fields.
- Temporarily disable "Require that this column contains information" in Library Settings > Columns (re-enable after upload if needed).
- Upload via sync client, which prompts for metadata during copy.
5. "The upload might be too large or the server might be experiencing high network traffic"
Causes: File exceeds limits or temporary service issues. Solutions:
- Confirm file size is under 250 GB.
- Retry after a short delay or during off-peak hours.
- Split large folders into smaller batches.
6. Access denied or permission-related errors
Causes: Insufficient permissions or broken inheritance. Solutions:
- Ask the site owner to verify your permissions (Site Permissions > Check Permissions).
- Test uploading to a different library or your OneDrive.
- Ensure the library is not in read-only mode (rare; check with administrator).
7. Errors specific to mobile or Teams uploads
Causes: App version or connectivity. Solutions:
- Update the SharePoint/OneDrive/Teams app.
- Use the web interface on a desktop browser as a workaround.
General Troubleshooting Tips
- Check upload progress: Click the progress indicator in the command bar to view specific error details for failed files.
- Alternative methods: If web upload fails, sync the library and copy files locally, or upload to OneDrive first and move to SharePoint.
- Browser testing: Use Microsoft Edge or Chrome; avoid Internet Explorer (deprecated).
- Clear caches: Clear OneDrive cache (Settings > Account > Clear cache) or browser data.
- Network checks: Ensure stable internet; large uploads may fail on slow connections.
- Bulk uploads: For many files, use the sync client or Power Automate to avoid browser timeouts.
- Logs and diagnostics: Administrators can review Microsoft 365 audit logs or use the SharePoint Online Health Checker tool.
Best Practices to Prevent Errors
- Rename files/folders before upload to comply with limits.
- Enable library versioning and require check-out only if necessary.
- Train users on drag-and-drop and sync methods.
- Regularly review blocked file types in the admin center.
- For large migrations, consider third-party tools that provide detailed logs.
If an error persists after these steps, capture the exact message, file details, and upload method, then contact your SharePoint administrator or Microsoft support with correlation IDs (if displayed). Refer to the latest Microsoft documentation at learn.microsoft.com/sharepoint for any updates beyond January 2026. This approach ensures efficient resolution and minimizes disruption to collaborative workflows.